Friday, April 24, 2009

Inspiration Revealed - Cherry Blossoms

"Inspiration revealed" is a new feature on the blog. I will utilize a collage and/or photos to show the inspiration and the end product. If you have a photo of something that inspired you and the piece of art you created from that inspiration, please send me some photos and I will post them in this feature. It's great way to share and get some free promo as well. If you have an online store, I will be happy to link to it!

Here's my first Inspiration revealed:

All those cherry blossom pictures I took this Spring were not for nothing. Their inspiration led to this lovely little addition to my "Out on a Limb" Series . The necklace and the inspiration below!

My creation

Monday, April 20, 2009

Through My Eyes - The Forest

I know I have had a ton of nature posts lately, but it is just so damn inspiring! Plus it's Spring , so after a long winter all the blooms and sprouts are exciting to see and I always seem to find something new that I didn't notice this time last year. So here is the Springtime Forest through my eyes. Hopefully you'll be inspired to venture into a forest near you and discover it's wonders!

Forest creatures great and small:


Forest flowers


Fresh Greenery


A Captured Wish


A Hidden Friend


And even a little tree hug:

Wednesday, April 15, 2009

Be Inspired to Create a Series & a Sneak Peek


I thought I would share a little sneak peek at some tiny things I'm working on today. They are all tiny pieces that will soon hang from a branch necklace and join my "Out on a Limb" Series. They were all inspired by Spring and obviously by things that may be found hanging from a branch. I hope to have them all in the shop some time next week. I don't tend to have the patience to create a series, so this is a big step for me. I often have grand ideas about expanding a design into a series, but rarely do I follow through, so I'm proud that I continued with this one. I'm having fun thinking of new tiny dangles to add and I'm trying to make sure that each has a special meaning behind it. So stay tuned for the rest of the series to be completed. if you have any suggestions for future additions, please feel free to comment (I've learned to take suggestions after following the advice from my last artist interview...Thanks MIL)

Here's what they looked like before painting:

Sneak Peak - Today's tiny creations

Here are the current necklaces in the series:

The First Leaf of Spring


Motherhood


Home Sweet Home


The Last Fall Leaf


The Last Acorn


Take some time this week to think about creating a series. Maybe do something like I did where you make a small change to an original design or create different items surrounding a central theme. Link the items through color, imagery or materials used. A series is a great way to learn to expand on an idea and to help you be more disciplined and focused. If yuou have a series, link to it in the comments and let us know what inspired it!

Thursday, April 9, 2009

Easter Egg Basket Tutorial


Don't buy an Easter baskets this year, make one of your own from recycled materials. Save your money, help the environment and make something special that will be cherished year after year. This is another project that's great for kids.

Egg Easter Basket Materials:

1 large balloon
Newspaper Strips
Papier Mache paste (click link for recipe)
Circle of cardboard
Acrylic paint in your choice of colors
Tissue paper or paper for decoupaging
White glue
cording for handle

1. Blow up your balloon to the desired size and shape. As you can see from my photo at the top, one was blown up more than the other which affected the overall shape.

2. Cover the newspaper strips in papier mache (removing excess) and cover the balloon. You'll need at least 5-6 layers for a sturdy basket (remember to change directions of the strips with each layer to make it stronger).

3. Allow the "egg" to dry overnight.

4. Once it's dry, test the strength of the egg and make sure there aren't any weak spots. The egg should be very stiff. If it's not stiff enough, add more layers of newspaper strips and let dry again.

5. If the egg is strong enough, use a craft knife to cut out the opening and remove the balloon, remembering to leave enough egg at the bottom to hold the grass and all the Easter goodies. I chose to mimic the shape of the egg, but you could use any shape you'd like. The shape of a bunny or a chick would be fun. You can use sandpaper to smooth the opening, or add some more papier mache strips to smooth it out. Let dry.

6. Cut a small circle from the bottom of the egg to create a base for the egg to stand on. Use a circular piece of cardboard to cover the whole, cover with masking tape and papier mache the inside and outside of the base. 3-4 layers on each side. Allow to dry.

7. Seal the entire egg basket with Gesso or primer (don't forget the inside too). Let dry.

8. Finish the egg by painting it and/or decoupaging with tissue paper or decorative paper. Add silk flowers, ribbon or any other embellishment to make it fun.

9. Add the finishing touches. Poke 2 holes in the top and feed through the cord (I used the cord handles from leftover gift bags). Tie a knot inside the egg on both side and pull tight. You can also add feet to your basket by gluing on wooden beads or make your own with polymer clay.

10. Fill with your favorite Easter goodies! Don't forget the peeps!

Saturday, April 4, 2009

Artist Feature: Liz Smith of Made in Lowell & The Power of Suggestion


How many times has a well intentioned family member or friend offered you advice on something that you should be making? I know I often find myself rolling my eyes at my husband when he has one of his "great" ideas about what I should be making. After reading this great interview from Liz Smith of Madeinlowell.etsy.com, I am rethinking how I immediately dismiss these ideas. Who knows, the next suggestion might be the next big thing. Read below to see how a suggestion turned into a lovely work of art!

What inspired this piece?

I almost hate to admit this, but a lot of my greatest ideas are inspired by other people’s suggestions! I guess I can take credit for recognizing the genius idea from the not-so-great, and then for the execution of said idea. I can also take comfort that my original items inspire others to see new products I don’t always think of. The ideas that resonate with me the most create a feeling like a little bell ringing in my heart.

In this case an Etsy buyer saw one of my nest pins and sent a simple convo that said “Hi, I just love this cute little pin. I thought it would be great for my mom but I immediately thought of it as a pin cushion. Is there a way to add a bottom to it so you could stick pins in it?”Ding ding ding!

Can you detail how you translated your inspiration into your work of art?


I thought that was a great idea so I developed a pincushion using one of my felted nests. It took a while but I worked out a technical solution to make them three dimensional and once I did, I loved the result! After making several in my bestselling nest pin colors like green, blue and purple, I realized customers were referring to them by “flavor” and commenting that they resembled cupcakes. So I took it a step further and made them look like cupcakes deliberately and now the “vanilla and chocolate” pincushions are a best seller!


Where do you tend to find inspiration for your art pieces?


Besides listening to everyone’s ideas, I find visiting a bookstore and looking through all the craft how-to books plus the craft, design and fashion magazines is about all it takes to get the creative ideas flowing. I usually end up racing home to try a new "lt" discovered technique! Also I like taking a walk if the weather is nice, snapping photos of things I wouldn’t normally notice, trying to find the beauty in the mundane. Interacting with other like-minded crafters/artists also help to get my energy back.

Any advice for someone feeling uninspired?
I usually have more ideas than time, but not always the excitement needed to develop a new project. I recommend doing something that soothes your soul, for me this is a nature walk. Another thing that gets me going is looking through my art supplies, just getting out a box of something pretty and laying it all out on a table. I start to experience that happy, childlike feeling inside that I get from making things, and before I know it the inspiration is flowing again.

You can find all of Liz's lovely creations in her Etsy shop : Made in Lowell on Etsy

Want to follow Liz on her handmade journey? Check out her
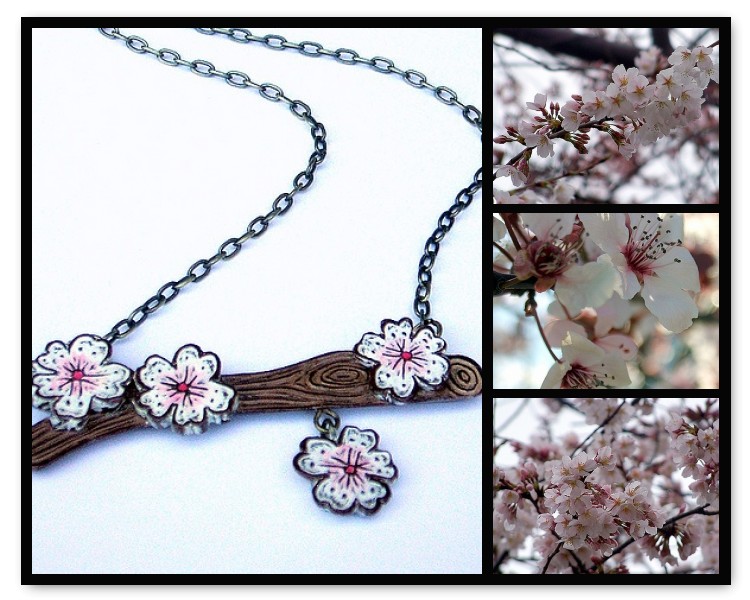
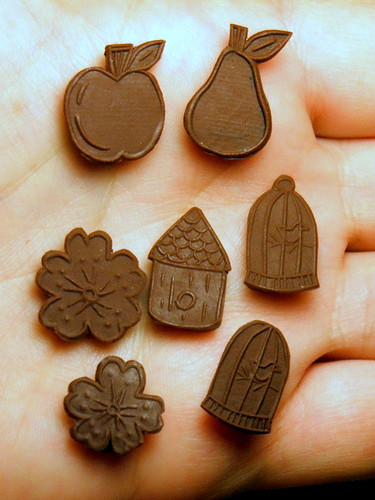
 Mill Girl blog

Not only is Liz wonderful felt artists, but she is also a pretty amazing polymer clay artist too. Check out some of my favorites from her shop:


So take Liz's advice and listen to those suggestions. I know when I get custom orders, I often make things I would never make if they hadn't been asked of me. Take those opportunities to step out of your comfort zone and explore something new!

Friday, April 3, 2009

BEST Jewelry Trunk Show this Weekend


Magnolia Designs, April 4, 2009 11:00-3:00

246 S. Conkling Street Baltimore, MD 21224

Lite Fare & Refreshments will be served.

This year Magnolia Designs welcomes members from the Baltimore Etsy Street Team to showcase their talents in their gallery. From contemporary metalwork, to beaded semiprecious stones, enameling, to cool vintage component accessories, you will find diverse talent at this trunk show.

Tucked away in an unassuming part of Baltimore, Magnolia Designs is a vibrant gallery located in the heart of the Highlandtown Arts District. Designer Felicia Zannino-Baker operates a home furnishing and art gallery where she features paintings, sculpture, and photography by local and regional artists. She also specializes in interior design and décor projects for the home.


Participating Jewelry Artists:

Elisa Shere


Allison Fomich
Maria Vashakidze + Minna Nilanont


Anne Madison


Thursday, April 2, 2009

Through My Eyes - Birds and Blossoms

No time for a big post today, so I thought I would share some of what inspired me this week and hopefully it will inspire you too!


Wednesday, April 1, 2009

And the winners are...........


As promised, we have the winners of the Giveaway!

First the random winner is CREATEaTHOUGHT! She will be the recipient of the pale green pendant!

The second winner is Digital Misfit who picked the perfect name for my New ACEO! She will receive the turquoise tree pendant. To see the winning name, check the ACEO listing in my shop!

Thanks so much to everyone that participated! I will make sure to do another giveaway soon!

New Tutorials - The Origami Rock & Faux Veggies

Here's a fun new tutorial for you today. Make sure you share it with your kids and don't skip any steps! I will announce the winners of the giveaway tonight. I decided to pick the ACEO name since it has dragged on longer than anticipated, so both winners & the new name will be announced tonight! In the meantime, be inspired to create something and give this tutorial a try!

Instructions:

Use an 8 ½ x 11 piece of paper, cardstock, or construction paper for this project. You can color your paper before you begin your folds to make the rock more rock-like.

1. Fold the paper in half, length-wise.
2. Fold in half width-wise.
3. Repeat on both sides.
4. Take the left corner and fold diagonally along the center line, like you are making a paper airplane.
5. Take the right corner and do the same.
6. Take the bottom left corner and fold diagonally along the center line, like you did in Step #4.
7. Take the bottom right corner and do the same.
8. Score all of the diagonal folds with a pen or butter knife.
9. Unfold the diagonal folds so that the paper is now folded width-wise in front of you.
10. Fold the paper in half again, width-wise.
11. Fold the paper in half, length-wise, twice.
12. Open up the template so you can see all of the fold lines on the paper.
13. Take both hands and crumple the paper into a ball. Your origami rock is now complete

Don't forget about April Fool's day today! Here's an extra tutorial for tricking your veggie- hating kids. Faux Peas & Carrots:


Materials: green and orange Starbursts, butter knife and your 2 hands

Cut orange and green starbursts in quarters and smooth the edges of the carrots and roll the green ones into balls. I tricked my kids 2 years ago and they loved it. To see more faux food pranks check out the Family Fun website.

LinkWithin

Blog Widget by LinkWithin

Photo/Video Guest Book